Friday, 27 February 2015

Wonder Wheel development

The Ferris Wheel has been base coated and I thought that I should get some colour on it. I went back to my Coney Island pictures for some inspiration.


The colours for the pods are in vertical stripes which is eye catching with the support trip-pod in blue and then a combination of red and yellow for the structure. I must admit that I like the yellow.


So I have made a start. It will be impressive on the board. I have yet to figure out what I will be doing with the ground, pavement, tarmac, loose gravel or combinations. I have been out and got a 900mm x 900mm piece of hardboard and ..... its not a big playing surface - thats for sure. I have even had a look in a few charity shops for bits and pieces - nothing to report, as yet.

Thursday, 26 February 2015

Joker crew assembling

Harley Quinn had been tasked with gathering the crew. Clearly something was up and getting ready was the order of the day.

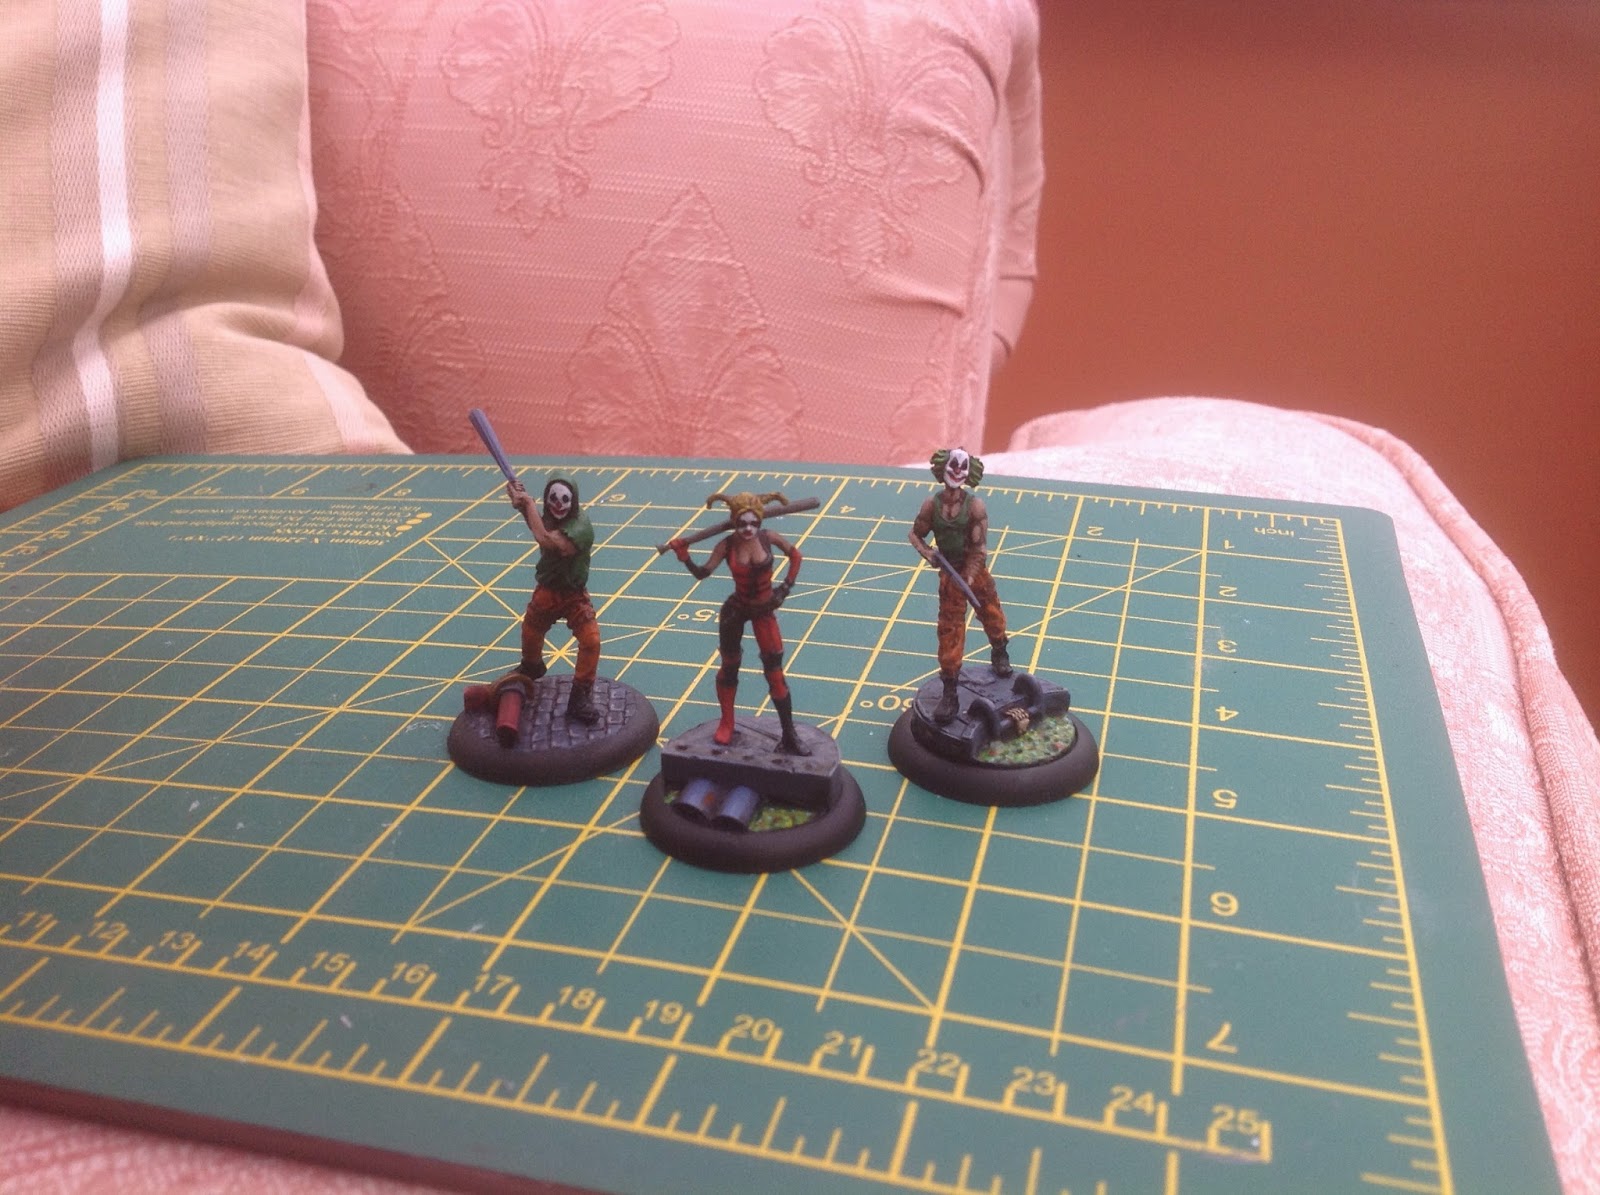
First off she figured that a shotgun was always handy to have in a brawl and so she went in search of Triston.


and sure enough, she found him with his 'game face' on, pockets bulging with cartridges and spoiling for a fight.

Next up she wanted someone that could handle themselves when it got up close and personal. She was a fan of the baseball bat and she knew just the person to call on - Contra Auguste.


Ah yes - the crew is a gathering.


They are starting to come together quite nicely. The themed bases are doing their job and the white faces really do stand out. I am looking forward to getting them stuck into a game and seeing how the perform on the battlefield.

Wednesday, 25 February 2015

Joker crew development

Its been a weekend of cutting and carving and pinning and green stuff. I thought that I would keep with the sewer base theme and made some purchases. I bought some resin bases and some metal inserts. There should be plenty to go around and it should give the crew a common theme. It does mean even more pinning but hey, ho.

To get me properly started I wanted to add the Joker to Harley Quinn, then Triston, August and Contra-Auguste.


I have been building up the paint layers and have yet to do the faces but it is coming along nicely. I had some fun painting the sewer slime. I started with a base of green and then dotted in lots of very small colourful dots. It gives it a vibrancy. In the main though I want the faces to be the main thing to draw the eye and I intend to spend some time on them to try and get them right. I have learned from Harley Quinn that white is very unforgiving. I love the skeleton hand clinging to the ladder on Triston's base, sweet little detail.

Next in line is Mr Hammer (yet to get him a base), Borgon and some of the clowns.


I have had a nightmare with Clown (tube). When pinning his feet I broke the model at his ankle. Then the arms didn't fit into the shoulders and when I tried to prize them apart, a little, the model broke at his hands. Currently I have a pin in each foot, a pin in each arm and another at his hands. He will need lots of green stuff but he will be properly 'bionic'.

Anyway - it is all coming along slowly and I have a third batch on models following along behind.

Mr Hammer is awesome and I am really looking forward to getting some paint on him.

Friday, 20 February 2015

Unboxing The Joker Crew - Oh dear

Great excitement - the postman finally arrived and had my Batman delivery with my Joker models. Just couldn't wait to get stuck in.

The first thing to say is that each model comes with its own game card which is very useful indeed and was unexpected.


So - I reckon that the makers of models have a couple of choices when it comes to assembly.

A. They recognise that the model will need pinning so they make sure they present the buyer with two nice big flat surfaces for ease of drilling.

or

B. They are confident of there modelling skills and design a male a female joint so the the pieces slot together quite easily and can be glued.

It is clear that Knight models have chosen option B above. It is also clear that confidence in their modelling skills has been misplaced (at least with this box set). Not one of the male, female slots is a tight fit. I have tried gluing all four models and am an unhappy chappie.

Pinning is going to be required and without flat surfaces it will be a pig. Not only that, but why oh why does anyone choose a wrist joint for a joint. It is the narrowest part of the arm and drilling will be a nightmare ... actually probably impossible. I might be able to cut the arm off at the elbow to form a pin surface and then use green stuff to remodel the arm. How absolutely dreadful!


Mr Hammer is a bigger model so I move on to him with hope in my heart. It would be nice to be able to assemble him.


But ... no, it is just the same. This time there is a great big shoulder joint which would be easy to pin if given two flat surfaces again we are presented with a male, female joint. This time it is quite large which should be a positive as the hammer is heavy but ... it is not a tight fit and wobbles. God I hate it!!!

I will have to carve out the shoulder joint and then come back with green stuff to remodel the shoulder in some way. Going to be a complete pain. Really, really?

I have two more blisters to open but am going to leave them for another day.

Customer experience opening this: -

Initial excitement - 10/10
Finding the card - 10/10
Model assembly - 3/10 and feeling very cheated.

Don't get me wrong the models themselves have lovely detail and I am looking forward to painting them but.... I wanted to assemble at least one of them (probably all of them) and get a base coat on so that I could start painting tonight - not going to happen and I am very disappointed.

Ferris wheel - over night update

Success!! - She held together and the glue has set and she works! The 'Wonder Wheel' is born.


This is Harley Quinn taking her first ride without the need for human intervention. The cog and ratchet mechanism are functioning properly and holding the pod in position. I've got to say that I am very happy. My expression is truly 'Jokerlike' :-)


The key change has been the use of cocktail stick dowels at the base to secure the ratchet mechanism in place. It can now operate in tension and therefore secure the cog even with the metal model adding significant weight to the outer limbs.

Now I do seem to recall an episode of Batman, back in the day, when the Joker flew over Gotham City dropping chemical bombs on to the population. Naughty Joker. I believe he did this from a very colourful balloon. I wonder if he stole it from the Fun Park? .......

Thursday, 19 February 2015

Ferris Wheel construction - part 3

Ha ha - I have taken some the much needed advice on board and ... voila!


The Ferris Wheel stands and does not fall over.

I have made alterations from yesterday though.

A. I have added a sheet of foam board to the base which has worked very well.
B. I have also changed the way the pods attach themselves. I went away from the clothes pegs and have used wire bits taken from paper clips instead. Now each pod is removable and so will be easier to paint.


The wheel goes through 360 degrees and can do so with a model or two on board. Each pod rotates fully. All very functional.

What it won't do is stay stable when a single model is located away from the centre line i.e. at the bottom of the rig.

So the big plan here is to introduce some kind of gear cog with a ratchet mechanism.


I have created a star shape with eight setting so the pods can be stopped in different positions. I then cut out a ratchet piece to fit into the gaps in the cog.


I used a long bamboo skewer which I plan to have 'in tension'. This should prevent the wheel from moving beyond its chosen position.


I think that the weak point in all of this will be the glue fixing everything to the central cylindrical timber piece. If this holds - then all should work - if not a rethink will be on the cards. That glue is currently setting so keep those fingers crossed!!


Wednesday, 18 February 2015

Ferris Wheel terrain - part 2

Managed to make some good progress on the old Ferris Wheel. Thanks for all the suggestions. I have altered my design so that two models can battle in each pod and also the wheel should now turn. Big improvements!

So first of all I strengthened each wheel by adding struts.


Again I was using PVA glue so lots of time needed for the drying.

Next I moved on to the Tripod on which the whole thing would be mounted. I decided to give Foamboard a go.


I measured up and drew out the shape that I wanted and strengthened the foot area to give more purchase. Then I cut out my 'A' shape frames.


I added some support at the back by way of skewers. Very effective. I pierced the foot to make sure that the weight would go all the way down and used PVA again down the length of the skewer. Lots of it.

Then I began to contemplate the pods. I had something in mind like a gondela with windows but if I was going to use them for battling I needed something more practical.


I cut out the shapes from foam board and then used cocktail sticks to dowel the sides to the floor pieces. This will make them strong enough to hold the models. I then needed to any the sides onto the  wheel. I came up with the idea of using the metal pieces from clothes pegs. I seems to work.


 By close of play the whole thing is starting to come together. Quite impressive. There are a number of issues however.

1. I want to be able to disassemble for storage and indeed painting .... emmm?
2. I think there will need to be more cross bracing and this is proving difficult with the low hanging and 360 degree rotating baskets ...
3. Will it be strong enough?
4. Why will any of the models use it - should it give access to something up high?

Anyway - I am loving pulling it together.

More to follow.